Operation ANTI VENOM at Fall In 2018

I had the opportunity to run the Operation Anti-Venom game at the HMGS Fall In Convention that I ran for our local group. I made some changes from the last game with input from the players as well as adding a few new surprises. Below is the Scenario for use with Where Heroes Dare! but could easily be adapted for other rules. Also are pictures from the actual game at the Con.
Operation Anti-Venom
Intelligence has found a Cobra weapons lab operating in Sierra Gordo under the administration of Dr. Venom. He is believed to have created a deadly neurotoxin that is to be used in terrorist attacks. Cobra Commander himself is scheduled to conduct a review of the operation. We have agents on the ground and we must shut down the lab and capture Dr. Venom and any other HVTs.
Turn Length: 8

Destroy Neurotoxin – 5 vps
Capture Dr Venom – 5 vps
Capture Cobra Commander – 5 vps
Each Neurotoxin Drum loaded onto the Freighter – 1vp
Cobra Commander boards the Cobra Sky Crane – 5vps
Dr. Venom boards the Cobra Sky Crane – 5vps
Special Rules
Capturing HVTs: A Character can only be captured if they are defeated in a Dire Duel. They do not need to be reduced to 0 DARE!, but if they are, they must be carried by another model. If they still have DARE! Left they are “In Custody” of one enemy model and must remain with them until they are passed to another or if their guard is killed they may act as normal.
GI JOE Operatives: The Joe player must pass an Easy DARE! Test, 1d10 to Activate one of their Agents. The Agent if Activated replaces any unactivated Cobra soldier in the current turn and begins it’s actions immediately. All 3 Agents can be activated, but it’s an Easy DARE! Test for each.
Neurotoxin Volatility: The neurotoxin can be targeted by small arms fire and will detonate on a 5 or under on d10 roll. The AP of the blast is 1 for each barrel within 1 inch of the shot barrel. Models within 6 inches of an exploding barrel take the hit with a -3 Moxie modifier. Destroyed barrels leave a flame marker that is treated as smoke for sighting and is AP 5 to move through.
Loading drums: I model may move a single drum 6 inches in a turn but may not shoot or Dire Duel.
Cobra Reserves: After A Joe Agent has revealed itself, Cobra may Activate any of it’s Reserves. The Reserves Activate at any of the reserve locations on the table and are subject to Snapfire rules as usual.
Terrain
Scatter terrain - -1 cover
Buildings - -3 cover
Vehicles - -2 cover
Deployed Forces
Player 1:
Dr. Venom
5 Cobra Vipers
Croc Master
5 Cobra Vipers
Ferret
Moray Hydro foil and Lamprey Pilot
Reserves entering the table on turn 3
Moray Hydro foil and Lamprey Pilot
5 man Cobra Diver team
Player 2:
Cobra Commander
5 Cobra Vipers
Scarface
5 Cobra Vipers
3x Anti Aircraft Guns
Reserves, may only be activated after the infiltrator Joes are revealed
2 x SNAKEs
Kwinn
Player 3:
Lt. Claymore
5 Air Vipers
HISS Tank
ASP with Gunner
Reserves arriving on turn 4
Wild Weasel
5 Air Vipers
Cobra Skycrane

Attacking Forces
Player 1:
Cutter
Gung Ho
Deep Six
Duke
Spirit
5x Steel Brigade
Killer Whale
SHARC
Reserves, may only be activated if all infiltrators have been killed. Is placed 20” from Highest ranking Cobra Lead
Snake Eyes
Player 2:
Torpedo
Shipwreck
Lady Jaye
Roadblock
10x Greenshirts
2x Devilfish
Manta
APC
Player 3:
Wild Bill
Airborne
Lowlight
Airtight
5 Steel Brigade troopers
Starduster
5 Jump Troops
Grandslam
5 Jump Troops
Tomahawk
Reserves, maybe activated at will
Scarlett
Flint
Mutt
Junkyard
And now pictures from the game itself-


And now pictures from the game itself-

A view of the overall table. In true Lancaster Host fashion, the table I was supposed to be set up on, was moved without any notification because the room was being remodeled. Oh and everything I hauled in need to travel up to the next floor, but the elevator was out. HMGS really needs to find a new venue....

A view from the other end.

The game begins with the Joe's first activation, the Killer Whale. It enters the table and fires onto Croc Master and his security team with it's double 50 cals.

Croc master lives but the Cobra Vipers and one of his crocs are killed. First blood is drawn!

The Cobra player activates the Lamprey in the Moray Hydrofoil, who climbs up into the 23mm turret gun and lands rounds directly into the front of the Killer Whale!

23mm rounds make short work of the Whale's armor, penetrates and brews up the hover craft killing a few crew, forcing Gung Ho, Cutter and the others to bail into the drink- COBRAAAAA!

More bad luck as the SHARC also gets shot up in the first turn by the HISS tank on the shore. Only Spirit survives, Duke and Deep Six are KIA.

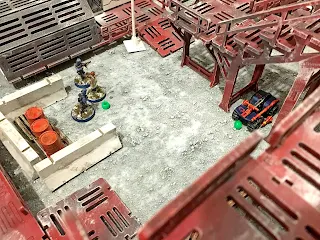
Cobra soldiers by the Venom Toxin take small arms fire and are pinned.

The Joe Jump Troops led by Star Duster land on the Arbco Star and begin firing on the troops on the shore.

Flint in disguise activates as the Viper on the Ferret and opens fire up onto the Cobra troops catching them by surprise. He takes fire from all angles and tries to get to safety under one of the walkways but is gunned down.

The Tomahawk lands it's insertion team with Lowlight and Airtight leading.

Croc Master sends his crocs forward after the Joes in the water but the crocs get pinned with small arms fire.

The Tomahawk unloads it's chin turret into the Venom Toxic, blowing it up and killing nearby Cobra Vipers- GO JOE!!!

Grand Slam's Jump Pack team lands on the Cobra Moray, killing the pilot and taking it over.

Scarlet reveals herself by the ASP and attempts to kill the operator but is gunned down. A Devilfish avenges her taking out the ASP.

The Devilfish attempt to engage the HISS tank and other targets on the shore.

With all the Joe Infiltrators killed, the Joes call in Snake Eyes.

A Cobra Viper reclaims the Ferret, shoving Flints body off of it.

Things are hot by the landing pad!

The APC deploys the second large Joe force by the Helicopter pad. Roadblock and Beachhead lead the way.

The Jump Troops on the captured Moray are shot up by small arms fire from the shore.

The HISS tank is finally taken out!

Cobra Commander moves inside the base to await the Helicopter EVAC.

The Joes from the downed whale make it onto the Arbco Star.

The crew of the Arbco Star fire onto the Joes.

The Tomahwak continues to pound Cobra forces on the shore.

Lowlight and Airtight advance on the Cobra installation.

Fires continue to burn

A SNAKE is activated as part of the Cobra reinforcements, the tide begins to turn...

Airtight and Lowlight come under heavy fire from the SNAKE.

The Joes on the Arbco Star advance on the base.

Starduster lands on the walkways by the base but is wounded.

More reinforcements arrive for Cobra, it's turn 4. The other Moray arrives back from patrol with the Baroness's kill team.

Lowlight attempts to snipe targets at the base.

The SNAKE moves forward and clears out the Joes.
The game went to turn 4 before the Joes called it for Cobra, the Joes suffered some heavy losses and could not push further into the base.
Thanks to all the players that came out, had a great time running it. I'm thinking of running another game next year for Cold Wars if there are enough players interested.
More to come,
Doc


That looks absolutely amazing Doc!
ReplyDeleteThanks! The players had a lot of fun, lots of people coming up and recognizing the vehicles and miniatures from the Comics and Cartoons.
DeleteJust wow again! I had the Tomahawk as a child and another friend had the Killer Whale. Great to see them in this great batrep. If I was part of your group, I would certainly want to play COBRA all the time!
ReplyDeleteThanks man, I always liked the Cobra toys more
Delete